Upgrading Steam Deck storage the lazy way
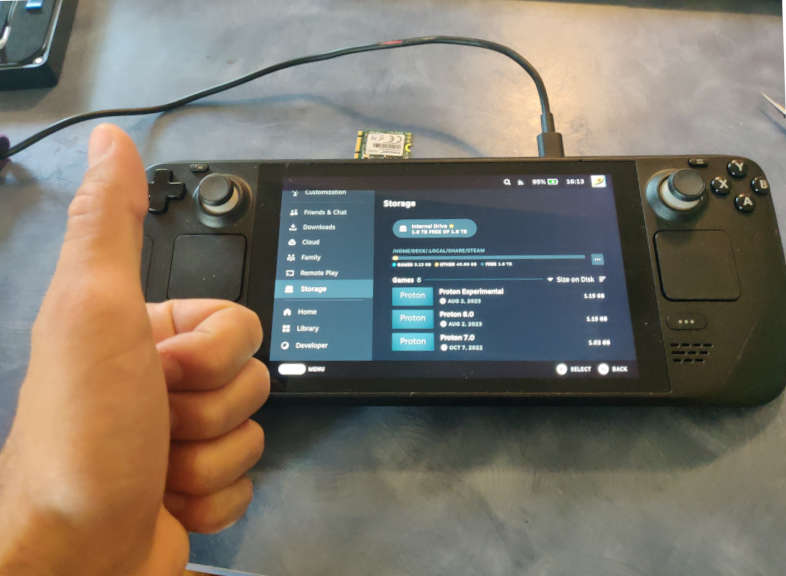
When I bought my Steam Deck over a year ago, I purchased the basic model with a very unassuming 64GB eMMC module for primary storage. I knew this wouldn't be enough on its own for holding the games I like to play, so I've gotten by with having my Steam library installed on an SD card. This has worked surprisingly well, despite the lower performance of the SD card when compared to something like an NVMe. Load times, etc actually weren't all that bad! Alas, all good things must come to an end... I started having issues with the eMMC drive filling up and I was constantly interrupted with "low storage space" notifications in Steam. I guess Steam stores saved games, Mesa shader cache, and other things like that on the primary drive despite having gobs of space on SD storage. Oops!
Since I can't be bothered to enter my Steam login, WiFi credentials, etc a second time on my Deck, I really wanted to preserve/transfer as much data from the eMMC to a new NVMe drive as possible. That's what this post is about. Spoiler alert: I was successful, and it was relatively easy/painless.
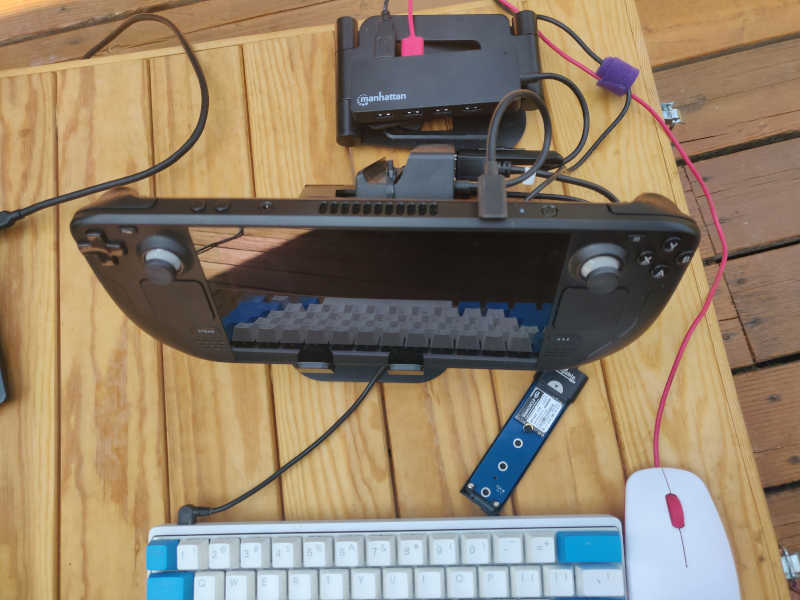
This post is not about how to dismantle the Deck to swap primary storage devices, there are tons of resources elsewhere on the internet for that. This guide from iFixit is the one I used, for the record.
A few folks on the internet have written guides and such where they removed the original drive and connected it to some other PC via a M.2-to-USB adapter. That seems silly, since the Deck is already a perfectly functional computer. I can use the SteamOS recovery image to boot into a Linux distro on the Deck for manipulating things and transferring data. I chose to use the recovery image since I knew it would already include a kernel, etc with support for running on the Deck. To be honest, probably any "live USB" image with a recent (>=6.0) kernel could be used. Follow instructions here to fetch the SteamOS recovery image, flash it to a USB drive, and boot it.
Once booted into the SteamOS recovery image, let's open up a terminal so we can take a look at the old eMMC storage device and the new storage device. The new device is an NVMe drive connected via a USB adapter:
$ sudo su -
# fdisk -l
...
Disk /dev/nvme0n1: 57.62 GiB ...
Disk model: E2M2 64GB
...
Disk /dev/sdb: 1.86 TiB ...
Disk model: JMS583
Now that we know which devices under /dev we need to work with, let's go ahead and copy the entire eMMC contents to the NVMe. Note: this should go without saying at this point... but please triple check the devices, this step will overwrite data on the destination drive!
# cat /dev/nvme0n1 > /dev/sdbThis step didn't take too long, decompressing and sending the SteamOS recovery image to a USB drive took far longer! And yes, this is a perfectly valid use of cat! I could have been really fancy with recreating the partition table on the new drive, mounting file systems, and using cp or something, but the original drive wasn't that big and this was far simpler / less error prone.
When that's done, let's extend the /home partition to fill all available space on the new drive using parted. Note: if prompted to correct the disk size in the GPT, then enter "Fix" so that the GPT has the correct size.
# parted /dev/sdb
(parted) print
Number   Start    End    Size    File system    Name
...
8        11.4GB   61.9GB 50.5GB  ext4           home
(parted) resizepart 8 100%
(parted) print
Number   Start    End    Size    File system    Name
...
8        11.4GB   2048GB 2037GB  ext4           home
(parted) quit
After the partition has been resized, it's time to resize the ext4 filesystem to fill the new available space in the partition:
# e2fsck -yf /dev/sdb8
< some messages about optimizations are fine >
# resize2fs /dev/sdb8
Resizing the filesystem on /dev/sdb8 to 497314129 (4k) blocks.
The filesystem on /dev/sdb8 is now 497314129 (4k) blocks long.
That's it! Now it's time to power down the Deck and replace the eMMC device with the shiny new NVMe!